


Trippy Drippy 'Technique'
- Sarah Murphy-Colourfulsaz

- Oct 7, 2021
- 3 min read
Updated: Apr 26, 2022

Hi all welcome back to what I’m calling my blog. I post on here without any kind of schedule so apologies for keeping you waiting if you’re a blog fan.
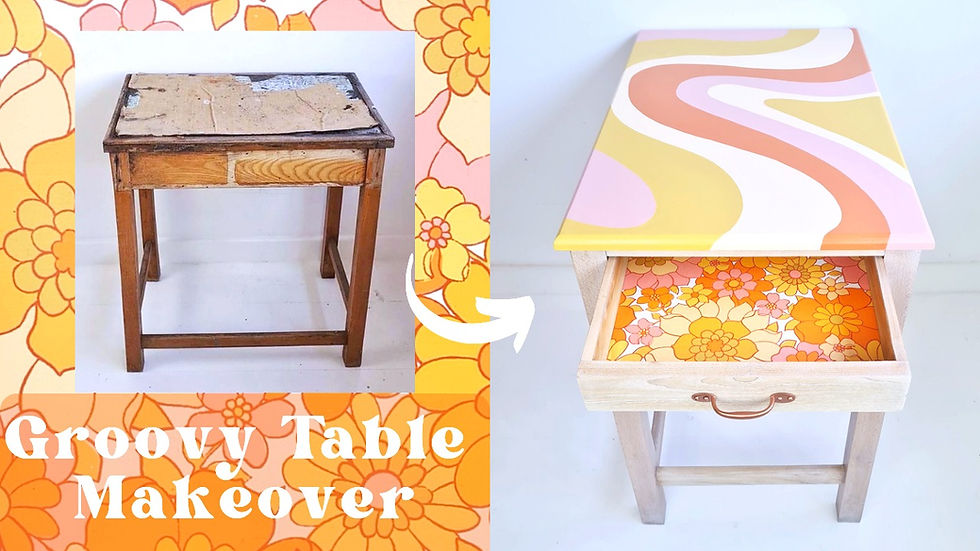
Today I’m talking about this super cool trippy drippy technique. It was really relaxing to do and I enjoyed seeing it come together. I’ve been in such a creative funk and this piece really got me back into the flow of it all. This piece and a canvas of this pattern are now for sale.
I have written out the instructions below but I also have a youtube tutorial I have created below. Scroll all the way down if you want to skip to the video!

Stuff I used
Two Fussy Blokes rollers (seriously, the hype is warranted)
Krud kutter
Cloths for cleaning
Stain blocking primer
Crown fast flow satin in various colours
Chalk paint- this needs to be sealed but blends really well and adds texture.
Neon acrylic paint- I got this on Amazon (optional but I like how this pops)
Spray bottle- another Amazon purchase
Water
Water-based varnish
Masking tape

How I did it
Dismantle- I took the piece apart removing hardware and the door. Next up is prep. for more info. on how to prep a piece of furniture properly check out my blog and tutorial
Clean- This piece was particularly dirty, I think it had been in someone’s shed. I used Krud Kutter to remove all the dirt and washed away any residue. I probably cleaned this piece 4 times all over. Hopefully, you won’t need to clean your piece this much but it is really important the piece is squeaky clean or the paint won’t adhere to it properly. You might need to change your water a couple of times.
Sand- This step is super simple and not at all time consuming I don’t know why people hate this part so much! You just have to give it a scuff with the sandpaper. This will take less than five minutes with a piece of this size.
Fill- Fill in any holes or dents using a wood filler. If the wood filler is the dense, difficult to sand type then try to use it sparingly. You’ll thank me later.
Sand again- anywhere that you have filled needs to be smoothed as those imperfections and textures will be obvious once painted.
Tape- using masking tape, tape off any areas you don't want to get paint on.
Prime - use a roller to prime the piece all over. This piece was pine so I used oil-based stain-blocking primer to seal those knots.
This is when I put the door back on this cabinet.
Base-Paint all over Using satin paint and a roller, paint the entire piece. This will be your base colour.
Drips- Okay the fun part. All you have to do is use your brush to create a brushstroke then use your spray bottle of water to create drips. It’s that simple. Use the water sparingly as this waters down your colour and can pool at the base of the piece depending on its shape.
Lines- I added some more opaque lines too using a light brushstroke to add depth.
Varnish- As I used chalk paint I had to seal this paint using a varnish. I used a smooth roller to apply this.
Hardware- Screw back on your handles.

I initially thought I wanted drips all over the piece but it looked too busy so I toned it all down by using the background colour. That's the best thing about this technique it will look different every time. When I went over the brushstrokes and drips with the background colour I watered it down a little to keep some of the depth I had already created. It was a happy mistake.
You can use whatever colours you like. Try not to get too caught up on what you want it to look like and just let it happen. Enjoy the process of creating itself. Hope you like it.


Comments