


Ombre/Gradient Technique
- Sarah Murphy-Colourfulsaz

- Aug 25, 2021
- 2 min read

Do you have issues when trying to get colours to seamlessly blend together? Well probably, that's why you're here right. Well, if you read the title which I hope you have.. anyways.
Today I'll be sharing with you all the knowledge I have gained from pulling my hair out over this technique.

My tips for the perfect ombre/gradient effect:
Use one paint brand- I cannot stress this enough. I used a few different brands so it was really difficult to try to blend paints of different consistencies.
Use a blendable/ runnier paint- As you will know I usually use satin paints for all my pieces. But if I was to do this again I would consider using chalk paint as I have heard it blends a lot easier and you can use a bit of water to blend it which leads me to my next point..
Water- use it sparingly as it can lead to runs but if you're really struggling it can help. In my case, I used a brush that hadn't completely dried yet so the dampness worker wonders.
Brushes- use super soft brushes for a softer gradient. Make sure to have lots of brushes also as you end up using a lot of them
Brushstrokes- work in long strokes from one side of the piece to the other in order to ensure there are minimal brushstrokes where you stop and start.
Add mid tones- if you're blending a super dark colour into a bright colour then you might need to bridge the gap between them by using a colour between the two of them. This can just make the blending a bit smoother and less stark.
Work quickly- blending only works whilst the paint is wet. If you keep overworking it whilst it's drying it will end up super textured and gross. Nobody wants that. So work quickly ensuring each coat has dried fully before attempting to blend again.
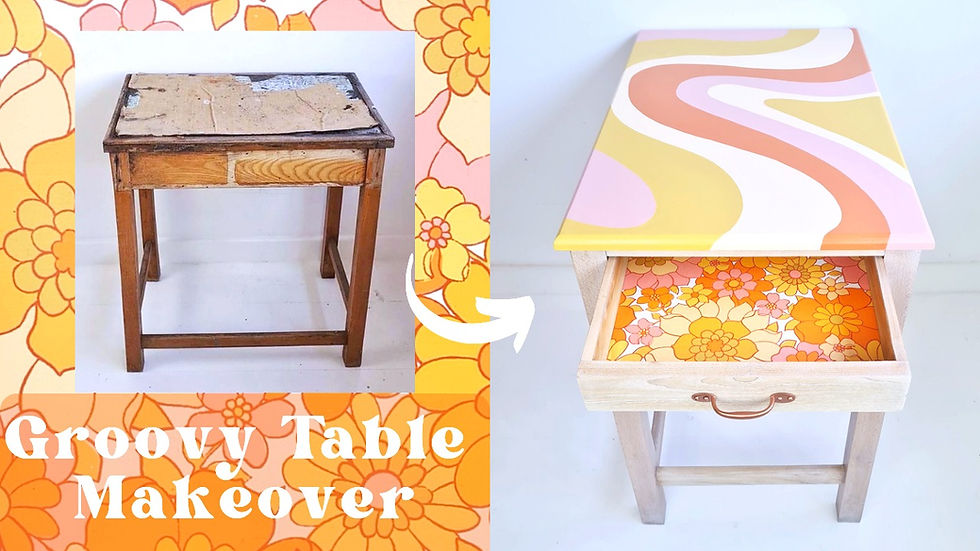
I hope you find this helpful and like the end result here. It's a rainbow gradient of dreams. Make sure to tag me if you use this technique yourself.


Comments